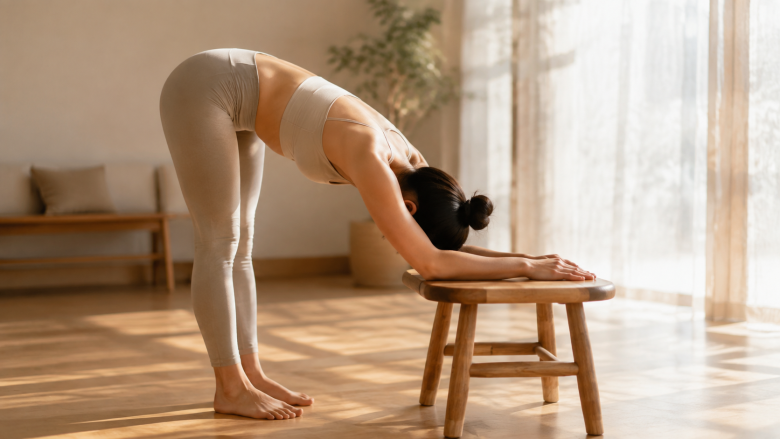
If your back hurts, the last thing you probably want to do is move. But here’s the truth I’ve learned from years of working through my own back issues and coaching others through theirs: gentle, intentional movement is often the fastest path to relief, while inactivity makes things worse. The key is knowing which movement is right for your specific type of pain, and how to start without triggering that fear response that makes everything tighten up.
This guide walks you through a complete, breath-led progression from floor-based stretches to standing core engagement, with clear modifications for sciatica, herniated discs, and spinal stenosis. You’ll also learn how to distinguish between acute pain (where you need to be more cautious) and chronic pain (where gentle movement is usually the medicine itself).
First, the Single Most Important Question: Is Your Pain Acute or Chronic?
Almost every article about back pain treats it the same way, but that’s a critical mistake. Acute pain (under 6 weeks) and chronic pain (over 12 weeks) need completely different approaches. Mixing them up is like taking ibuprofen for a broken bone or trying to stretch a muscle strain on day one.
Acute Pain: The Protection Phase
When you suddenly throw your back out, your body goes into protective mode. Muscles spasm, inflammation spikes, and everything feels locked up. This is your nervous system’s way of saying “stop moving.” In this phase, you want minimal, controlled movement. Think of it as communicating to your body that it’s safe, not as exercising.
For acute pain, gentle movement means:
Soft, pain-free range-of-motion exercises
Short sessions (5 minutes, 2-3 times daily)
Never pushing into pain — staying well within comfortable limits
Chronic Pain: The Reconditioning Phase
Once pain persists beyond 12 weeks, the original tissue injury has usually healed — but your nervous system has become hypersensitive. The pain is real, but it’s amplified. In this phase, movement is medicine. It retrains your brain to understand that movement isn’t a threat, and it rebuilds the strength and stamina your back muscles have lost from guarding.
For chronic pain, gentle movement means:
Consistent, progressive sessions (15-30 minutes)
Mild discomfort is acceptable, but sharp pain is not
A focus on building tolerance and capacity over time
When I first dealt with chronic lower back pain, I made the mistake of treating every twinge like a fresh injury. I’d stop moving for days, which only made me weaker and more sensitive. What finally broke the cycle was learning to distinguish between “hurt” (sharp, alarming) and “discomfort” (dull, manageable). That distinction changed everything.
The Psychological Barrier: Why “Will This Hurt?” Is the Real Problem
Most people don’t realize that the fear of movement — called kinesiophobia in clinical terms — is often a bigger driver of back pain disability than the physical tissue damage itself. When you’re afraid to move, you avoid activity. Over time, your back muscles weaken, your joints stiffen, and your brain’s pain mapping becomes more sensitive. It’s a vicious cycle.
Here’s what I tell everyone I work with: your body is not fragile. It’s not a china doll that will shatter if you move wrong. The tissue damage that caused your initial pain has almost certainly healed. What remains is an overprotective nervous system that needs to be gently re-educated.
This is where the concept of graded exposure comes in. You don’t have to jump straight into a full exercise routine. Instead, you start at 20% of what you think you can tolerate, do it successfully, and let that success build confidence. Over weeks, you slowly increase the difficulty. Each small win rewires your brain’s expectation that movement equals pain.
One of the most useful tools I’ve found is a simple pain-movement journal. Before you move, rate your fear on a scale of 1-10. After the movement, rate your pain. Most people find a huge discrepancy — they expect a 7 and feel a 3. That data is gold for retraining your expectations.
Breath Work: The Missing Link in Every Back Pain Routine
Every back pain article lists stretches, but almost none mention the breath. This is a massive oversight. Your diaphragm is directly connected to your lower back through connective tissue, and your nervous system’s relaxation response is mediated through breathing. You cannot fully relax a tight back while holding your breath.
Diaphragmatic Breathing: The Foundation
Before attempting any movement, master this breath pattern. Lie on your back with knees bent, feet flat on the floor. Place one hand on your chest and one on your belly. Breathe in through your nose so your belly rises (your chest hand should barely move), then exhale slowly through your mouth so your belly falls. Aim for a 4-second inhale and a 6-second exhale.
This isn’t just relaxation fluff. The National Institute of Neurological Disorders and Stroke notes that deep breathing activates the parasympathetic nervous system, which reduces overall muscle tension and pain perception. When you combine this breath with movement, you train your body to move without bracing — which is the single most important skill for back pain recovery.
Here’s the pattern: inhale to prepare, exhale to move. Every single exercise below follows this rhythm. The exhale is when your body naturally relaxes and decompresses, which makes it the perfect moment to move into a stretch or engage your core.
The Progression Framework: From Floor to Standing
This is the framework I’ve refined over years of trial and error. It moves you from the safest, most-supported positions on the floor to more challenging standing work. Each phase builds on the last. Don’t skip ahead — your nervous system needs to master each level before it’s ready for the next.
Phase 1: Floor-Based Mobility (The “Safe Zone”)
These exercises are performed lying on your back or on all fours. They’re the most protected positions for your spine because gravity isn’t loading it. Start here if you’re in acute pain, are very deconditioned, or have a high fear of movement.
1. Knee-to-Chest Rocks
Lie on your back with knees bent. Gently draw one knee toward your chest, holding the back of your thigh with both hands. On your exhale, rock your knee gently from side to side about 6 inches. This is a mobilization, not a stretch — don’t force the knee closer than comfortable. Alternate legs, 10 rocks each. Most people find this feels like a massage for their lower back.
2. Pelvic Tilts with Breath
Lie on your back, knees bent, feet flat. Inhale to prepare. As you exhale, gently press your lower back into the floor by tucking your pelvis slightly. Hold 3 seconds, then release on your inhale. Repeat 10 times. The movement is subtle — you’re working with your breath, not forcing motion. This activates the deep core muscles that support your spine.
3. Cat-Cow (Slow Version)
Start on all fours with wrists under shoulders and knees under hips. Inhale, let your belly drop toward the floor and gaze slightly up. Exhale, round your spine toward the ceiling like an angry cat, tucking your chin. The entire movement should take 8-10 seconds — this is a breath exercise as much as a mobility one. If your wrists hurt, make fists instead of flat palms.
4. Child’s Pose with Side Reach
From all fours, sit back toward your heels, extending your arms forward. Rest your forehead on the floor. If your knees are tight, place a folded towel in the crease. On an exhale, walk your hands to the right, feeling a stretch along your left side. Hold one full breath cycle, then walk to the left. Repeat 3 times each side.
What can go wrong: When I first tried these exercises, I moved way too fast and aggressively. I treated them like a workout rather than a nervous-system reset. The result? I flared up my pain and got discouraged. The fix was slowing down — taking 10 seconds per rep instead of 4. Gentleness is a pace, not a style.
Phase 2: Core Engagement (Building Stability)
Once floor mobility feels comfortable (you can do all of Phase 1 without pain), it’s time to build the stability that prevents future flare-ups. The goal here isn’t crunches — it’s teaching your deep core muscles to switch on during movement.
5. Dead Bug (Modified)
Lie on your back, knees bent at 90 degrees, arms reaching toward the ceiling. Exhale, press your lower back into the floor. Keeping your back pressed down, slowly lower your right arm toward the floor overhead while your left leg extends straight. Go only as far as you can while keeping your back flat. Return on an inhale. Alternate sides, 6 reps each. If lifting both arm and leg is too much, just do the arm for a week.
6. Bird Dog
From all fours, exhale and extend your right arm forward and left leg backward simultaneously. Keep your hips square to the floor — don’t let one side dip. Hold for one full breath cycle (4 sec in, 6 sec out), then return. Alternate, 8 per side. This exercise teaches your back muscles to coordinate with your core, which is essential for everyday movements like walking and bending.
7. Glute Bridge (Breath-Led)
Lie on your back, knees bent, arms at your sides. Inhale to prepare. Exhale, squeeze your glutes and lift your hips until your body forms a straight line from shoulders to knees. Hold 3 breaths, then lower on an exhale. Repeat 10 times. The bridge strengthens the glutes — which are often weak in people with back pain, forcing the lower back to overwork.
Here’s a crucial insight most articles miss: your glutes are your back’s best friend. Weak glutes mean your spinal erectors and hip flexors take over, leading to compression and pain. Two weeks of consistent bridges did more for my back than a month of stretching.
Phase 3: Standing and Integrated Movement
This phase transitions you to real-world movement patterns. It’s where you build confidence for daily activities like walking, carrying groceries, and getting in and out of cars.
8. Wall Sit with Arm Raises
Stand with your back against a wall, feet 2 feet from the wall. Slide down until your knees are at a 45-degree angle (not 90 — that’s too intense for beginners). On your exhale, raise both arms overhead. Inhale, lower them. Do 10 reps. The wall sit builds leg strength while keeping your spine fully supported.
9. Standing Side Bends
Stand with feet hip-width apart, hands on hips. Inhale to lengthen your spine. Exhale, lean gently to the right, keeping your shoulders square forward. You should feel a stretch along your left side. Return to center on an inhale. Repeat 5 times each side. This is a great way to bring back rotation and lateral mobility without loading the spine.
10. Gentle Squat to Chair
Place a chair behind you. Stand with feet slightly wider than hip-width. Inhale to prepare. Exhale, sit back toward the chair as if you’re going to sit down — but catch yourself just before your butt touches and stand back up. This is a partial squat that mimics the mechanics of sitting and standing, which is where most people re-injure themselves. Do 8 reps with control.
For a deeper exploration of building movement tolerance through walking, see our 30-Day Gentle Walking Challenge for Beginners. Walking is often the most accessible form of back pain relief, and a structured progression helps you avoid the too-much-too-soon trap.
Condition-Specific Modifications: Sciatica, Herniated Discs, and Stenosis
All back pain is not created equal. The exercises above are a solid baseline, but you may need to modify them based on your specific diagnosis. Here’s where things get personalized.
Sciatica and Herniated Discs
If your pain radiates down your leg, or you’ve been diagnosed with a disc issue, you need to be particularly careful with forward bending and spinal flexion (rounding forward). The classic recommendation from physical therapists is to favor extension-based movements — arching backward — which can help push a bulging disc back toward the center.
Modifications:
Avoid knee-to-chest and child’s pose if they cause leg pain to increase.
Focus on cat-cow but spend more time in the cow position (arch downward).
Add prone press-ups: Lie on your stomach, prop up on your elbows, and let your lower back relax. Hold 30 seconds.
Skip the standing side bends if they compress the affected side.
The “centralization” phenomenon is worth knowing: if your leg pain moves up toward your spine during an exercise, that’s often a good sign — it means the movement is helping. If it moves further down your leg, back off.
Spinal Stenosis
Stenosis is a narrowing of the spinal canal, and it typically causes pain that worsens with standing and walking but improves with sitting and bending forward. People with stenosis actually need flexion-based exercises — the opposite of disc patients.
Modifications:
Knee-to-chest is your friend — it opens up the spinal canal.
Child’s pose is excellent for symptom relief.
Use a stationary bike instead of walking for cardio, since cycling in a forward-leaning position is better tolerated.
Be cautious with extension exercises like prone press-ups — they may increase leg pain.
The thing nobody tells you about stenosis: extension-based exercises (like standing up straight and arching back) can trigger severe leg cramping within minutes. If you feel that, you’re doing the wrong movement pattern for your condition.
What’s the Worst Thing You Can Do for Back Pain?
It’s not heavy lifting or running. The worst thing for most people is complete bed rest for more than two days. This used to be standard medical advice, but it’s now well-established that prolonged inactivity weakens spinal muscles, reduces blood flow, and increases pain sensitivity.
Studies have shown that people who stay active — even with pain — recover faster than those who rest. The key is relative rest: reduce your activity level, but don’t eliminate it. You can still do gentle movement, walk short distances, and perform basic daily tasks.
The second worst thing is pushing through sharp, nerve-type pain. There’s a difference between muscle discomfort and the electric, shooting sensation of nerve irritation. If an exercise causes sharp pain that radiates, stops you mid-movement, or lingers for hours afterward, you’ve done too much. Good back movement should feel like a stretch, not an injury.
Third on the list: twisting while lifting. This is how most people re-injure themselves. The combination of bending and rotating is the most stressful position for spinal discs. Always turn with your feet, not your torso, and never lift while twisted.
What Kind of Back Pain Gets Better with Movement vs. What Needs Rest?
Here’s a simple rule of thumb: if your pain is mechanical — meaning it changes with position, gets worse after sitting all day, or feels better when you move around — it’s almost always improved by gentle movement. This category includes most muscular back pain, facet joint dysfunction, and many disc issues.
Pain that gets worse with movement is a red flag. If every step intensifies your pain, if you have numbness in your saddle area (groin or inner thighs), if you’ve lost control of your bladder or bowels, or if pain wakes you from sleep — stop moving and seek medical attention immediately. These are signs of cauda equina syndrome, a surgical emergency.
A good middle ground is the “first 10 minutes” test. When you start moving, note your pain level. If it decreases or stays the same after 10 minutes, movement is likely helpful. If it progressively worsens, stop and rest. This simple self-assessment has saved my clients from countless flare-ups.
How to Build a Daily Practice That Actually Sticks
The best back pain routine in the world is useless if you don’t do it. Consistency beats intensity every time. Here’s how I structure my routine, and what I recommend to others.
The 15-Minute Daily Framework
Morning (5 minutes): Gentle mobility — cat-cow, pelvic tilts, knee-to-chest rocks. This “primes” your back for the day and reduces morning stiffness. For a structured way to ease into your day, check out our Energizing Morning Routine with Light Movement.
Midday (5 minutes): Breath work and core engagement — dead bugs, bird dogs, glute bridges. This breaks up prolonged sitting, which is one of the biggest contributors to back pain.
Evening (5 minutes): Relaxation — child’s pose, gentle side bends, diaphragmatic breathing. This helps you decompress from the day and prepares your body for sleep.
The exact exercises matter less than the rhythm. You’re building a habit of showing up for your back daily, just like you brush your teeth.
Tracking Progress Without Obsessing Over Pain
Instead of tracking pain levels (which can be discouraging), track what you can do. Can you now touch your toes? Walk up stairs without holding the railing? Carry groceries without bracing? These functional wins are the real measure of recovery.
Keep a simple log: date, exercise, duration, and a 1-10 score for “confidence” (not pain). Confidence is a leading indicator — it improves before pain does. Watching your confidence score climb week over week is deeply motivating.
Most people don’t realize that back pain recovery is rarely linear. You’ll have good weeks and bad weeks. A bad week doesn’t mean you’re back to square one — it just means your nervous system is having a sensitive spell. The goal is to keep movement gentle and consistent anyway, and let the trend over months be your guide.
When to See a Professional (And What to Ask For)
Gentle movement is a powerful tool, but it’s not a substitute for professional care in certain situations. Seek help if:
Your pain lasts more than 6 weeks without improvement
You have weakness in your legs or feet
You’ve had a recent fall or injury
Your pain is accompanied by fever, chills, or unexplained weight loss
When you do see a physical therapist, don’t just ask for “exercises.” Ask for graded exposure guidance — you want a progressive plan that addresses both the physical and psychological aspects of your pain. A good PT will teach you how to move with confidence, not just hand you a list of stretches.
Also worth asking: “Can you assess my fear of movement and help me address it?” Most PTs are trained in this but won’t bring it up unless you do. Breaking the fear cycle is often what separates people who recover from those who stay stuck in chronic pain.
Final Thoughts: You Are Not Fragile
Your back is remarkably resilient. It’s designed to move, bend, twist, and lift — and it will thank you for treating it with confident, gentle activity rather than protective stillness. The path from “my back hurts” to “my back feels strong” is paved with small, consistent, breath-led movements done without fear.
Start where you are. If that means 5 minutes of lying on the floor doing pelvic tilts, that’s perfect. Your future self will be grateful you started today.
The gentlest movement you can do consistently is infinitely more powerful than the perfect exercise you never do.