What Is Gentle Movement Yoga (and Why “No-Stretch” Works)
If you are stiff, sore, or convinced that yoga is not for you because you cannot touch your toes, gentle movement yoga is your doorway in. This is not about holding poses for minutes or forcing a deep hamstring stretch. It is about continuous, mindful motion — slow circles, wave-like spinal rolls, and breath-led transitions that lubricate your joints and wake up your muscles without ever asking you to stretch beyond your comfort zone.
The core idea is simple: move first, stretch later. When your body is cold and tight, stretching is often counterproductive. It can trigger a protective reflex that makes muscles resist even more. Gentle movement, on the other hand, gradually increases blood flow, warms up synovial fluid in your joints, and tells your nervous system that it is safe to release tension. That is why the “no-stretch” approach works for absolute beginners, older adults, and anyone with chronic stiffness or joint sensitivities.
In this guide, I will walk you through a 7-minute flow that I designed after years of teaching people who thought they were too stiff for yoga. I will also show you how to modify every movement for a chair or a wall, why this approach is different from static holding, and how to build on it once your body starts to open up.
Why Most Beginners Fail at Traditional Yoga (and How Gentle Movement Fixes That)
When I first tried yoga at 38, I walked into a class that promised “beginner-friendly.” Within ten minutes, the teacher had us in downward-facing dog, and I felt like my entire spine was about to snap. I spent the next 20 minutes counting down to savasana, embarrassed and frustrated. That night, I decided yoga was not for me. It took me another five years to realize the problem was not my body — it was the class.
Traditional yoga sequences often assume a baseline of flexibility and mobility. They jump straight into static postures that require long hamstrings, open hips, and a mobile thoracic spine. For a stiff beginner, those postures do not just feel uncomfortable — they can be genuinely unsafe. The thing nobody tells you about yoga is that static stretching on a cold body increases injury risk. Your muscles are like cold taffy; they need warmth to be pliable. Gentle movement provides that warmth gradually.
Gentle movement yoga flips the script. Instead of asking your body to conform to a pose, you move your body in ways it already knows — circles, rocking, and rolling. These micro-movements are not just warm-ups; they are the practice itself. They improve your range of motion over time without ever triggering your stretch reflex. Think of it as oiling a stiff hinge before trying to swing it open all the way.
Most people do not realize that the body’s fascia — the connective tissue that wraps around muscles and organs — responds better to slow, shearing forces than to sustained pulling. Gentle movement creates that shearing effect, which is why it can be more effective than static stretching for releasing chronic tension. According to the National Center for Complementary and Integrative Health, yoga may help with low-back pain and improve quality of life, but the style matters. Gentle movement is a style that respects your current limits.
The 7-Minute No-Stretch Flow: Step-by-Step
This flow is designed to be done on a mat, but you can also do every movement in a chair or standing against a wall. You will need a comfortable space, bare feet or socks, and a timer (though you can also just follow the breath counts). The entire sequence is about 7 minutes when you move at a slow, steady pace. Do not rush. The goal is to feel the movement, not to finish it.
1. Seated or Standing? Start with What Your Body Says
Begin by sitting on a chair or on the floor with your legs crossed if that is comfortable. If you are on the floor, sit on a folded blanket to tilt your pelvis slightly forward. If your hips are very tight, a chair is better. Place your hands on your knees and close your eyes. Take three deep breaths, letting your shoulders drop away from your ears.
This is not a meditation — it is an internal scan. Ask yourself: Where do I feel the most locked up? Neck, shoulders, lower back, hips? You will not target all of them in 7 minutes, but you can spend an extra few breaths on the area that feels worst.
2. Neck Rolls (1 minute)
With your spine tall, gently drop your right ear toward your right shoulder. Then roll your chin toward your chest, then your left ear toward your left shoulder, and back to the right. This is a full circle. Do not tip your head back — keep the movement in the front and sides of the neck. Make the circle as small as you need; it should feel like a massage, not a stretch.
After 30 seconds (about 5-6 circles), reverse direction.
What can go wrong: If you go too big, you can compress the cervical spine. Keep the nose pointed toward the chest when you come to the front. If you feel dizzy, stop and just do chin tucks (nodding) instead.
3. Shoulder Rolls and Arm Waves (2 minutes)
Lift your shoulders toward your ears, then roll them back and down, making big circles. Do 10 backward circles, then 10 forward circles. This is more about loosening the shoulder girdle than about stretching the chest.
Then, extend your arms out to the sides at shoulder height. Begin to make small circles with your hands, as if you are stirring a pot. Gradually increase the circle size until you are moving your whole arms in slow, controlled arcs. Do not force any range — let the motion be fluid. After a minute, reverse direction.
This is where I see most beginners make a mistake: they hold tension in their jaw and neck while moving their arms. Keep your face soft, and let the movement come from your shoulder blades, not just your wrists.
4. Cat-Cow on All Fours (or Chair Version) (2 minutes)
This is the most valuable movement for a stiff back. Come onto your hands and knees with your wrists under your shoulders and knees under your hips. If your wrists are sensitive, make fists and rest on your knuckles, or use a folded towel under your palms. If you cannot kneel, sit upright in a chair with your feet flat on the floor. Place your hands on your thighs.
Inhale, arch your back like a cow: let your belly drop toward the floor, lift your chest, and gaze forward. Exhale, round your spine like a cat: tuck your tailbone, draw your navel to your spine, and drop your head. Move slowly, coordinating with your breath. Each cycle should take about 6-8 seconds.
Do 10 cycles. The magic here is not in how far you can arch — it is in the continuous motion. Your spine is made of many small joints, and this movement lubricates them all. If you feel a click or a pop, that is normal as long as there is no pain. If you have a herniated disc or acute back injury, keep the movement very small and consult your doctor first.
5. Hip Circles and Rocking (1 minute)
Return to sitting on the floor or chair. If you are on the floor, sit with your legs extended in front of you, knees bent, and feet flat. Place your hands behind you for support. If in a chair, simply sit forward and place your hands on your knees.
Now, make a circle with your torso, as if you are drawing a large circle with your pelvis. Inhale to one side, exhale to the other. Do 5 circles in each direction. This is a full-body movement that mobilizes your lower back, hips, and pelvis. Keep your shoulders relaxed and your breath smooth.
Then, for the last 30 seconds, do a gentle figure-eight movement with your pelvis — like a slow hula hoop. This is often the first movement that shows people they are not as stiff as they thought.
6. Final Rocking and Release (1 minute)
Lie on your back with your knees bent and feet flat on the floor. If that is not possible, stay seated in your chair. Gently rock your knees side to side, letting your spine twist softly. This is a massage for your back. Keep your shoulders grounded. Do not force your knees to the floor — let gravity do the work.
After 30 seconds, hug your knees into your chest (or, in a chair, fold forward over your thighs). Hold for two breaths, then release. This is the only time you are holding a position, and it is a release, not a stretch.
Finish by lying still for a minute, or sitting quietly. Notice how your body feels. You have just completed a full gentle movement practice without a single static stretch.
Modifications for Stiff Joints, Chronic Pain, and Limited Mobility
This flow is designed to be adaptable. If you have knee osteoarthritis, rheumatoid arthritis, or general joint sensitivity, here are the key modifications:
- Use a chair for the entire flow: Sit or stand next to a chair for support. For the cat-cow, sit tall in the chair and place your hands on your thighs; you can still arch and round your spine against the backrest.
- For wrist pain: Do the cat-cow with your forearms on a chair seat or a bolster, or make fists. You can also do it standing with your hands on a wall.
- For hip pain: Keep the hip circles small, or do them while lying on your back with knees bent. The rocking motion in step 6 is particularly gentle on hips.
- For dizziness: Avoid neck rolls and instead do chin nods. Keep your eyes open and focus on a fixed point.
If you have a specific condition like spinal stenosis or a recent fracture, always check with a physical therapist before starting any movement practice. The general rule is: if a movement causes sharp, shooting pain, stop. If it feels like a dull ache or just “tightness with motion,” you are likely safe to continue at a smaller range.
Remember: gentle movement is not about doing less. It is about doing smarter. You are not avoiding work — you are creating a safe environment for your body to rediscover its natural range.
The Science Behind Gentle Movement (and Why It Beats Static Stretching for Beginners)
What makes gentle movement different from static stretching? It is not just about comfort — there is a physiological basis. When you hold a static stretch, your muscle spindles (sensory receptors) detect the length change and trigger a reflex that causes the muscle to contract, protecting it from overstretching. This is called the stretch reflex. It is why you feel a rebound when you hold a hamstring stretch too far.
Gentle movement bypasses this reflex because the change in length is gradual and continuous. The muscle spindle sends a signal that says, “We are moving, not being yanked,” so the muscle can relax and lengthen over time. This is why slow, rhythmic movements are more effective for increasing flexibility in chronically tight muscles than static holds.
Research supports this. A 2015 study published in the Journal of Physical Therapy Science found that dynamic stretching (which involves movement) improved hamstring flexibility more than static stretching in older adults. While that study used more dynamic stretching than our gentle flow, the principle is the same: movement-based lengthening is safer and often more effective for stiff populations.
Furthermore, gentle movement stimulates the production of synovial fluid, which lubricates your joints. This is especially important for people with osteoarthritis or general joint stiffness. When you move a joint, the synovial membrane secretes fluid that reduces friction and nourishes cartilage. Static stretching does not produce this effect because there is no joint motion.
So, the science is clear: if you are stiff, you need to move, not stretch. This flow is designed to give you that movement in a way that respects your body’s current limits.
How to Make This a Habit (and When to Move to Static Stretching)
The best way to make this a habit is to do it at the same time every day. I recommend doing it first thing in the morning, before you even have your coffee, because that is when your body is stiffest. You will feel the difference immediately. Over time, you will notice that your morning stiffness subsides faster, and you might even look forward to the movement.
Another option is to use this flow as a warm-up before a walk or any other exercise. If you are already doing our 30-Day Gentle Walking Challenge, you can do these 7 minutes right before you head out. It will make your walk feel easier and more fluid.
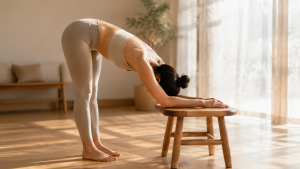
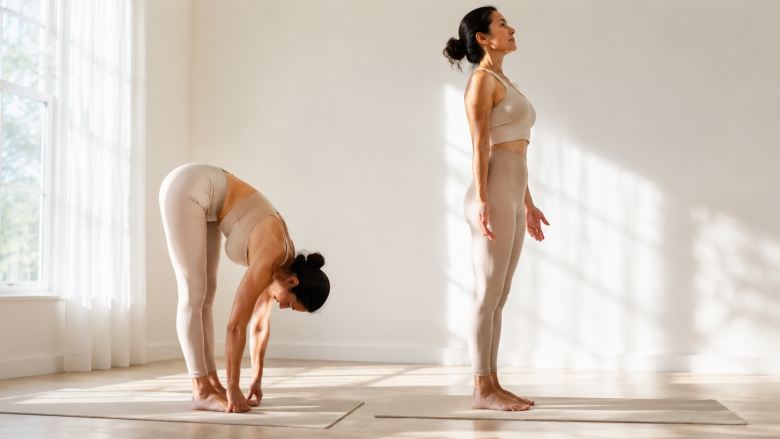
After two to four weeks of consistent practice, you will likely notice that your range of motion has increased. That is when you can start adding a few static stretches — but only after your body is warm. For example, you might do a gentle seated forward fold after the flow, or a lying glute stretch. The key is to never stretch cold. This is the same principle we outlined in our Beginner’s Guide to Light Daily Yoga Poses — sequence matters.
If you want to deepen your practice, consider adding a longer flow on the weekend. But keep the first three months focused on gentle movement only. This builds the foundation of body awareness and breathing that makes static poses safe and effective.
Common Mistakes and How to Avoid Them (From My Own Experience)
When I first started teaching gentle movement, I made a few mistakes with my own practice that I want to help you avoid.
- Mistake #1: Going too fast. I used to rush through the movements to get to the “real” yoga. But the speed is the practice. If you rush, you activate the stretch reflex and lose the benefit. Slow down until you can feel the movement in your joints, not just your muscles.
- Mistake #2: Holding your breath. Movement and breath are linked. If you hold your breath, your muscles tense. Use the exhale to soften into each circle. If you lose track, just take a few breaths and restart.
- Mistake #3: Pushing through pain. There is a difference between discomfort and pain. If you feel a sharp, stabbing sensation, you are doing too much. Back off to a smaller range. If you feel a dull ache, you might be okay, but listen to your body’s message.
- Mistake #4: Ignoring your neck. The neck is a common area of tension, but it is also fragile. Keep the neck rolls small and slow. If you have any cervical spine issues, skip them entirely and move your shoulders instead.
- Mistake #5: Expecting immediate flexibility. This is a gentle practice, not a quick fix. You might not see dramatic changes in a week, but you will feel them. I remember a student who could not touch her knees after a month of gentle movement. She was discouraged until she realized she could now reach her ankles without pain. That is progress.
Here is the thing nobody tells you about gentle movement: it is not passive. It is active, mindful work. You are not just “waving your arms around.” You are systematically asking your body to release patterns of holding that have been built up over years. That takes time. Be patient with yourself.
Your Next Steps: From Gentle Movement to Full Practice
Once you have been doing the 7-minute flow for at least three weeks, you can start to expand it. Here is a simple progression:
- Week 1-2: Do the flow exactly as written, 3-4 times per week.
- Week 3-4: Increase to 5-6 times per week. Add an extra minute of hip circles or shoulder rolls.
- Week 5-6: Add one static pose after the flow, such as a seated forward fold or a gentle twist. Remember to keep the static holds short (30 seconds) and only after the body is warm.
- Week 7+: Try a full beginner yoga sequence that includes poses like downward dog and low lunge, but always start with the 7-minute flow as your warm-up.
If you need a space to practice, you do not need fancy equipment. A clean floor with a towel or a mat is enough. For tips on setting up a home practice area without spending a lot, check out our How to Set Up a Budget Home Yoga Corner guide.
And if you want to combine this with morning energy, our Energizing Morning Routine with Light Movement article offers a longer sequence that flows seamlessly with this approach.
Remember, the goal is not to become a pretzel. The goal is to move with ease, to feel your body wake up, and to build a relationship with movement that is kind and sustainable. The 7-minute no-stretch flow is your first step. Do it tomorrow morning, and see how your day feels. I think you will be surprised.